Thursday, August 22, 2013

Quick Breakfast Bread - courtesy of Aunt Sandy

So scrolling through Facebook yesterday I came upon a picture of beautiful bread.

Picture Courtesy of my Aunt Sandy
Isn't that bread gorgeous!? Studded full of dried fruit and looking absolutely delicious. I had to know.

So going through the post I discovered that my Aunt Sandy had made this bread, she calls it "Quick Breakfast Bread." In the words of my Aunt "Just made Quick Breakfast Bread - my own creation. This recipe is super easy to make and pretty healthy - no oil, low sugar, and full of healthy fruits and nuts! Took some last night to a gathering and it disappeared! Had to make another loaf this morning for our house."

After that description on top of the picture I had to make it. Of course I'm cheap so I didn't buy any nuts to put in it but I can tell you it would just make it taste even better I'm sure.

So I scanned the ingredients. Flour, check. Brown sugar, check. Baking powder, check. Salt, check. Ground cloves and cinnamon, check. Milk, check. Only thing I didn't have was the dried fruit and nuts.

So after working out and sending the handsome man off to work I headed to Walmart for the missing ingredient and to maybe hunt down a fruit and nut mix.

Upon entering Walmart in any town of any state you are bound to have an adventure. Honesty there really isn't a way not to in some way. You are at least entertained. It's comical to me.

Anyway, my adventure began soon after entering the doors. I had walked in wearing my sweaty workout clothes (they do fit and cover all parts necessary). As I walked in there was this little girl (about 7) who had stopped dead in her tracks as she had been leaving with her mother and her eyes popped out of her head and she started to bounce. She had spotted a friend at the Subway in the entry and was obviously excited. Her mother stated "Well don't have a heart attack" and I proceeded to head for the back of the food section. Then about 20 feet in I hear this LOUD belch come from between the two doors you walk through. I turned around momentarily and just kind of snickered to myself. After walking past the produce this young man looked and me and said "do you run track?"

I had to quickly think, well technically no but I ran track in 7th grade and then in June as well. Mind you this was internal talk to myself. I smiled and said yes, because I do run everyday. The man had this triumphant look on his face as he said "I knew it, I have a knack for these things." I just smiled and kept walking. It was 9 pm and I really wasn't in the mood to chat with someone as I was on a mission.

I found the dried fruits but couldn't find a delicious combo of fruits and nuts that would work in my bread that wouldn't cost me more than $3. (I'm a cheapskate - ask Mike).

So headed home and break out all the ingredients and begin to follow the directions:


It already looked magnificent. Though I changed a few things. I didn't add nuts and I used 1/2 flour and 1/2 oats. Up the fiber a bit since I was using unbleached white all purpose flour.

Then add milk.


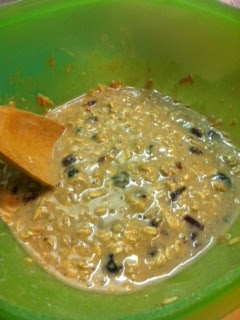
It smelled heavenly with the cloves and cinnamon, almost Thanksgiving like.

Now the fun part, deciding on a pan. For whatever reason I have not replaced the loaf pan I used to have and tossed due to wear and tear. So I found this pan hiding under all the casserole dishes.


Make due with what you have. So I do.

The recipe said to bake for 1 hour at 325 degrees F. Well, my electric oven runs a bit hot. Also, on another note, I can't stand electric ovens/stoves. I miss my old gas oven. So I only baked for 20 minutes to start. It wasn't done so I added another 10. It came out perfect at 30 min in a larger pan and my oven.

Anyway, I digress. This came out beautifully. Flat - but beautiful. I think I may have actually forgotten to add the baking powder. Oh well, still amazing.


So this is fresh and smelling wonderful. My kitchen now smells irresistible. I of course, cannot wait to dig in. 1. It's fresh, hot bread out of the oven. 2. Perfect timing to add butter or other toppings as desired. 3. This just looked AMAZING.

So I sliced up a sliver and taste tested.


I must say this is DELICIOUS! Perfection in a loaf. You could of course add any sort of dried fruits you want or any nut. My aunt recommends pecans or walnuts but get creative by all means. The fruits I used were a berry mix (cherries, blueberries and cranberries). I found this combination to be perfect. Though I can guarantee I will try apples, raisins, goji berries etc. Whatever strikes my fancy that time.

I will probably be making another loaf tonight just because I could literally eat this whole pan of bread by myself in one sitting. Hopefully Mike likes it too, he didn't get home until 8 this morning and am unsure if he had some for breakfast or not.

So thank you Aunt Sandy for the delicious recipe :) Keep them coming.

Quick Breakfast Bread
Courtesy of Aunt Sandy

Makes roughly 8 servings

Ingredients
2 cups flour (or 1 cup flour and 1 cup old fashioned oats)
1/2 cup brown sugar
2 1/2 tsp baking powder
3/4 tsp salt
1/4 tsp ground cloves
1/2 tsp ground cinnamon
1/2 cup dried fruit of choice (I used cherries, cranberries, and blueberries - get creative with your choices)
1/2 cup chopped nuts (I omitted because of cost - that's me)
1 cup milk (I used skim)

Directions
Preheat oven to 325 degrees F.

Grease a 9 1/2 inch loaf pan (or 8 inch square pan in my case) and set aside.

Mix all ingredients except milk.

Add milk and mix well.

Put batter into the prepared pan and bake for 1 hour. (I baked for 20 to start then had to add another 10 min to that to cook completely).

My aunt recommends toasting and serving with butter or cream cheese.

Also can mix up all the dry ingredients the night before and then just add milk in the morning and bake while you get ready in the morning. Warm breakfast bread fresh from the oven in no time. :)

Now go out and cook!

Wednesday, August 21, 2013

Quack!! Marinated Duck Breast Wrapped in Bacon

So it's August and that means kids are back in school and the summer is closing as we approach Labor Day faster and faster.

This also means that hunting season is upon us, or at least approaching (to Mike at a snails pace).

So since duck season is coming Mike has been preparing his decoys, gear, and calls. I will be joining him at least a couple times this season to go hunting. Starting with dove as it's a bit warmer and my personal dislike of severely cold conditions is evident in my hands losing color and feeling, Mike thinks that dove will be a good start. We will see how I do on a duck hunt later to see if I can 1. handle the cold and 2. like it.

So recently we have not really been cooking a crazy amount. We just moved to a new apartment and together so we have cooked more at home but nothing we haven't already cooked or is really not something we think we need to blog about.

However, on Monday - Mike's day off - he decided that we would have duck. We have plenty of game protein in the freezer from last years hunting season. So he pulled some duck breast out and marinated it and wrapped it in bacon. Was absolutely delicious. He has cooked duck for me before and the new recipes and techniques he had tried prior to Monday were iffy if tasty at all to me. If the meat is gamey I tend to not care for it as much and it was either gamey or tough from being overcooked.

Wild duck is different than duck you may order at a restaurant or with your Chinese takeout. Wild duck, in this case mallard, cannot be cooked through. You treat it like a good cut of steak. That is precisely what Mike did and it was like having a redneck filet minon. It was fabulous!!! And for me to say that, that means it was good.

He paired it with mushroom risotto and some bacon wrapped asparagus. What a meal!! Best meal we have had in the new place. Hope to have many more.

See the recipe here at his blog "Fowl Mouthed Therapy."

Now go out and cook!

Monday, July 8, 2013

Rainbow Jell-O Shot Cake (Adult Party Treat)

Oh my goodness where have we been!?!? We've neglected the poor blog here for a while. We have been busy though. Crazy schedules, summer holidays, no time. No time at all. Back in June I had a track meet for the KC Corporate Challenge and so that took up a good week of June. Prior to that were races and a myriad of other things like trap shooting for KC Corporate Challenge as well.

 So back in mid-April, I ran Color Me Rad 5k, by myself...since my friends are lame and don't like to run. ;)

Color Me Rad: April 2013
Then a week later I ran Warrior Dash 5k Mud Run with 3 great people. Joe and I pretty much stuck together through the race and were ahead of Becca and Amy. Was chilly in the 40's but we did it.

Warrior Dash: April 2013
Then in early May Mom and I walked the Mother's Day 5k in my city. It was Mom's first 5k and a celebration of losing over 100 lbs. :) She rocks!!


Mother's Day 5k: May 2013

Then in late May I competed in the KC Corporate Challenge trap competition at Smithville Lake Missouri. I shocked myself and won 2nd place in my division for the women. How cool is that!!!??? And to think I had only practiced for 3 months. Next year's goal....1st place.

KCCC Trap: 2nd Place May 2013
So then in the first week of June we had the KC Corporate Challenge track and field meets. I competed in the 400m, the 800m, the 1 mile run, and the 4x400m relay. Here is my awesome relay team. We came in 5th in our division but heck, we did awesome in my book.

KC Corporate Challenge
So with me being busy with races, meets, and competitions Mike has been busy running around at work training and covering during the summer season. He, I am sure, is ready for hunting season. We are also looking forward to going to St. Louis to spend time with his family in October for the pig roast. Hope we get to see his folks before then too. Scheduling hasn't worked out quite enough for that recently. He also attended a wedding of a co-worker last weekend. Isn't he handsome?


So all in all it's just been busy and I can't say we have really been cooking a lot of awesome things due to that busy schedule we have maintained for a few months. 

We are also moving in the next couple of weeks so that makes for interesting plans anyway. So we are limited at this point. Soon I will be extremely limited to paper plates and plastic-ware.... 0_o

So, on to the purpose of this post. Jell-O infused with vodka, vanilla ice cream flavored mind you, and then layered upon itself to create a rainbow. 

Of course this requires 7 boxes of gelatin, 6 colors and 1 plain.


Of course this also makes me think, I need a mold - unless everyone wants me to make it in a Power Cat mold. Which of course since all these folks that will be eating it are pretty much from Missouri, it's a resounding "no." So instead, since we will all be at the pool I decided a sand bucket would suffice. Yes, I washed it thoroughly and it was purchased new to boot.


So I have laid out my ingredients all pre-measured to ensure easy start and finish to this monumental task. We have 3 cups of vodka, 4 1/2 cups water, 1 1/8 cup vanilla yogurt, 3 pkgs plain gelatin, 6 packages flavored jell-o in the rainbow colors of ROYGBIV (minus the indigo). Then We have the mold and a saucepan.

So this requires that you go layer by layer. Which I didn't think was terrible. You have a regular red (strawberry) layer, then you have a yogurt red layer, then orange, yellow etc until you reach the last color.

My reds sort of mixed a little, so I knew the top layer was going to look a bit off since I had issue with the amount of time it was taking to set up (20-30 min my patootie).


You have to really do about 2 colors at a time, so make 1, then when you have that set aside, start your next while you wait for your jell-o to set up a little.


Then you end up with 2 or more bowls at any given moment and a measuring cup as well as a bucket full of jell-o firming up....my kitchen was getting a little cramped.


The fun part was when I started the lime jell-o. The smell reminded me of church events and also "Ghostbusters." I know, strange combination of memories, but I can't help but think of Slimer when I see green jell-o with floating globs of vanilla yogurt.


So you alternate layers, plain, then yogurt. It starts stacking up over the course of a few hours like this. Glad I got the big bucket honestly. Didn't think green would be this high already.


By the time I had reached the blue layers I was ready to hit the sack, it was around 11 pm (I always start these things too late, or get the urge to bake at 10pm - why Lord, why!?)


I was getting excited after the blue layer since that meant only 1 layer I had to stay up for. That last vanilla yogurt infused layer I could leave overnight and not worry about.


So upon reaching the purple ending of the night I was ready to leave it in the fridge. I had begun, around the orange layer to set the bucket in the freezer for half of the recommended sitting time for set up so that this would go faster than 6 hours. Honestly it seems to have worked out just fine.


So all in all, it seems to have worked just fine. Once that last purple layer was semi-set in the freezer I pulled that baby out and poured the final layer and placed in the fridge to be forgotten about until morning, where I toted to work to keep in the fridge to prepare for the 1 hour drive out to drop off.

I hope everyone enjoys it.


****NOTE: If you want t make this for kids instead, just substitute the liquor for juice or water instead.***

Rainbow Jell-O Shot Cake
INGREDIENTS:
4 1/2 cups water (divided)

6 - 3 oz pkgs flavored gelatin (6 different colors - remember ROYGBIV)

6 tsp (3 envelopers approx) plain gelatin (like Knox)

3 cups rum or vodka (I used half plain vodka and half vanilla ice cream flavored vodka by Most Wanted)

1 1/8 cup vanilla yogurt (divided)

DIRECTIONS:
1. Place bottle of liquor in the freezer for several hours if not overnight before beginning recipe.

2. Lightly spray bundt pan/or chosen mold with non stick cooking spray (get creative with your mold, I used a kids sand bucket purchased new for a pool party - you could use just about any container). Wipe off excess spray with a paper towel. A slight residue should remain, just enough to help unmold the gelatin without affecting the taste or appearance.

3. Pour 3/4 cup water into a saucepan and sprinkle with 1 teaspoon of the plain gelatin. Allow gelatin to soak for a minute or two. Heat over low heat, stirring constantly, until gelatin is dissolved (about 5 minutes). Whisk in the first package of flavored gelatin. Whisk for at least 2 minutes, or until completely dissolved.

4. Remove from heat. Add 1/2 cup of the cold liquor, and stir to combine.

5. Pour 3/4 cup of the gelatin mixture into the prepared mold, and place in refrigerator (or in my case freezer for 10 min). Allow to set for 20-30 minutes, until gelatin is a little firm, but still sticks when touched. VERY IMPORTANT - if the layers set up too much, the next layer won't bond appropriately.

6. Refrigerate the remaining gelatin mixture in bowl for about 5-7 minutes or until slightly thickened and cooled. Gradually stir in 3 tablespoons of yogurt and stir until well blended. **This cooling step is also important - the gelatin must be cooled to room temperature before adding on top of other layers, or the layers will not be well defined.

7. Gently spoon the gelatin/yogurt mixture over set gelatin and return to refrigerator (freezer for 10 min). Refrigerate for 15 minutes or until gelatin is set but not firm (again, it should stick to finger when touched). As the layers progress, the setting time will become shorter as the pan and gelatin becomes colder, and the layers become thinner as more layers are added to the mold.

8. Repeat steps with remaining gelatin flavors, for a total of 12 alternating clear and creamy gelatin layers.

9. After completing all the layers, refrigerate the gelatin mold overnight. To unmold, fill a larger container or clean sink with warm water. With clean fingers, loosen the gelatin around the edges of the mold cavities. Next, dip the mold almost to the edge into the warm water for just a few seconds (10 seconds is usually more than enough). Dry the bottom of the mold with a towel and check the edges to see if they are loose. If not, repeat the dip for just a few more seconds. Place your serving plate on top of the mold and invert.

Your masterpiece is now ready to serve.

(recipe courtesy of Just a Pinch)

Now go out and cook!

Thursday, April 25, 2013

Pork Schnitzel with Mushroom and Onion Marsala Sauce

This was a fun and relaxing weekend. Enjoyed time together and made sure to make the most of it. Even with Mike working Friday and Saturday we had fun.

Saturday night I went out to dinner with a friend because we are not old and cannot be going to bed at 8pm on a Saturday, it's just not cool.

So we ate Greek salads at the local Italian restaurant. Mike razzed us for that numerous times. Oh well, it sounded good.

Sunday Mike and I made cheddar & bacon coated chicken tenders. It's a Betty Crocker recipe but neither of us thought the coating stuck very well and that cheese and bacon do not work well as a chunky coating. It didn't taste bad, but it wasn't anything phenomenal. We also made baked steak fries fresh from a real potato, nothing frozen there. We also had a bagged bacon Caesar salad for a veggie. Then our friend, who I had had dinner with the night before, came over and brought ice cream and cookies for dessert.

The company made up for the lack luster dinner. Still, can't complain when the food is decent and the company is great. It was nice to get together with someone and just chat and have a good time.

Mike and I also went turkey hunting this weekend. As I am not licensed in the state of Missouri I just went along for the ride. First hunting outing ever. To say the least, I had a blast.


Then after hunting, we ate, then proceeded to go for a run, with the crazy sidewalks in that small town Mike resides in.

I say the person who put this in was drunk. Go home sidewalk man, you're drunk!

Then he lounged and took a nap while I finished phase two of my workout, Rush Fit. If you haven't figured this out by now, I'm a bit of a fitness nut and actually enjoy working out, mostly running. I guess that's why I can just about eat anything I want.

So after naps and workouts we decided dinner was needed and that we needed to use up the pork cutlet we had plus buy more to make sure we had enough to go around.

Needless to say the word "schnitzel" came to mind when thinking about a pounded out pork cutlet. I must say that is the word of the blog today "cutlet."

So off we went whisked away to Walmart for more ingredients and then back to make dinner.

We paired this with mashed potatoes (we did instant but making old fashioned mashed potatoes with some baby reds would have been much better.) Then we also had some cinnamon applesauce which was homemade.

Take about 5 apples, granny or pretty much your favorite apple. Peel and Chop. Add all into a quart sized pot with 1/2 cup of water and 1 tsp of apple pie spice. Simmer for 15 minutes then add 1/4 cup sugar and 1 Tbsp brown sugar and simmer for another 5, stirring occasionally throughout process.  Then mash it all up as chunky or as fine as you like and enjoy.

In the mean time, check out this deliciousness


Pork Schnitzel
Via: Taste of Home Cookbook
Prep/Total Time: 25 minutes
Servings: 6

6 pork sirloin cutlets (1/2 inch thick & 4 oz each)
1/2 cup all -purpose flour
2 tsp seasoned salt (like Lawry's)
1/2 tsp ground black pepper
2 eggs
1/4 cup milk **I left this out - accidentally - but it turned out just fine. So if you can't have milk or just want to omit we are proof that it works fine.
1 1/2 cups dry bread crumbs, plain **of course I would say to use only 1 cup since we had A LOT left over
2 tsp paprika
6 Tbsp vegetable/olive/grapeseed oil **We used grapeseed because we felt like it, worked well. Use what you have and what works best for you

Directions:
Flatten pork cutlets to 1/4 inch thickness **Or you can be like us and go to your local wally-world and pick up pre-tenderized pork cutlets that are already 1/4 inch thick. Less work and no pounding required**

Combine flour, seasoned salt, and pepper in a shallow bowl (large enough to dip your cutlets in). In another bowl beat eggs and milk. In a third bowl combine bread crumbs and paprika.

Create an assembly line station that ends in a plate to place battered pork. **I did two cutlets at a time because that's what fit in the pan to cook.**

Dip pork into flour first, then egg mixture, then into crumb mixture.

Cook pork in oil in a large skillet over a medium heat. **Again, we cooked only two at a time to prevent crowding** Cook on each side for about 3-4 minutes until tender. Remove to a cookie sheet lined in foil with a wire rack on top. Place in a 150-200 degree oven to keep warm and crisp.

Serve with a dill sauce or you can serve with a onion, mushroom Marsala sauce.

We did the following:
1 small yellow onion, chopped
1 pkg (8 oz) white button mushrooms, sliced
1/2 cup Marsala cooking wine
1 pat beef broth (it comes in this jelly like state and you boil it in about 1/2 a cup of water to create broth - or you could just use 1/2 cup of beef broth)

Saute onions over medium heat until just translucent. Then remove from pan. Put beef broth in pan and bring to a boil then reduce to a simmer. Add Marsala, mushrooms and onions. Everybody in the pool!

Cook over medium low heat until starting to reduce. You can add a slurry (corn starch mixed with COLD water) 1 tsp at a time to reach desired thickness.

Now go out and cook!

Tuesday, April 16, 2013

FOR BOSTON

Yesterday was tragic on all levels.

I had a hard time wrapping my head around the fact that someone would terrorize a marathon. The fact that my sport has now been terrorized makes me angry. This was a day for rejoicing, breaking your personal best times and uniting together from nations across the globe to one purpose. A time honored tradition in the heart of Boston.

I'm the runner of the blog and I ran my heart out for Boston yesterday after work. Today I will again, I don't care how sore I get or if I'm tired, if it's raining or shining. I'm going to run every day for those affected. I will not be terrorized. I will not let this shake me or my sport.

You have to remember that fear is what this was meant to create. Fear to go out, be who you are, and live your life. You cannot do that. You cannot let fear consume you. You have to stand up and push forward. You have to look fear in the eye and take it head on and push past it.

Terrorist (foreign or domestic) want to create mass fear and chaos. Don't let them. Don't be afraid to go to your upcoming races, gatherings, meetings, trips, and vacations. That is exactly what you should do. Keep living life.

I am sending thoughts and prayers to all the victims, the families of the victims, the runners, and all the first responders. Those people who ran TO the scene instead of from it. Those people who saw more carnage than anyone should ever see. I want to hug them all.

I can just hear certain song lyrics running through my head

"Justice will be served and the battle will rage, this bog dog will fight when you rattle his cage."
"And justice is the one thing you should always find, you've got to saddle up your boys, you've got to draw a hard line."

I pray justice is served to those responsible.

RunJunkees.com created this amazing picture to be used as a race bib, a second if you're running. I will run with this all week. I will also make a shirt for my Warrior Dash run next weekend.

FOR BOSTON!


Today I'm wearing a race shirt for Boston, I am also dedicating every run this month to Boston.


Monday, April 15, 2013

Fluffy Sandwich/Snacking Bread (Vegan actually) - for your tax day woes

Happy Tax Day, Pay Day and Spring Turkey Season Opening Day!

So we are back to the bread, yes I love my homemade bread. Of course this time it was not an attempt at my favorite sandwich shops bread. Of course, I still wish I knew the recipe. If only I could bribe the man that owns the place. Maybe with my super secret Gooey Butter Cupcake recipe. Who knows, I probably won't ever find it or figure it out just on the basis that I'm not a food chemist, of course I'm sure I could buy the bread and find a laboratory to break it down for me, I do know people that probably know people who could get this done.

Who knows.

I digress - back to fluffy sandwich bread, or in my case, snack bread. I really should go out and buy a full size loaf pan. I had one that my mother had given me but the coating was flaking off and causing my bread to have flecks of non stick goodness ick on them. Not cool, not cool at all. So I even tried using foil and anything else I could to line the pan - honestly if it's not needed it's a pain.

So, I tossed the pan, I shall buy a new one sometime. But I had to buy running shoes first and so I did.

This bread was appealing in the fact that the ingredient list is not terribly long and the process is straight forward. I also liked that it had oats in it instead of just flour. This recipe also does not require that you use bread flour. SCORE!!

I would love to be able to spend all my money buying different flours and spices and doo-dads for the kitchen but alas, I'm not a millionaire. Probably never will be, working on it. Of course I doubt that I will ever be famous either - not that I want to be, I really to like my privacy and I just can't see paparazzi swarming to my humble one bedroom brownstone apartment in the suburbs of Kansas. Just doesn't seem to fit the area. So I will work hard and live happy.

Speaking of happy, this weekend was one of those, how Mike and I say, "off" weekends. A weekend where we do not see each other. Of course there are many reasons to why this weekend was that way. 1. He has Spring turkey season starting today. 2. I had a race this weekend, Color Me Rad 5k for Special Olympics. 3. I had a family friend coming to my home town, and I have to see her when I can, she lives in Minnesota.


So 9 AM I was off running a 5k by myself, because my friends don't seem to like to run races. Even fun ones where you get pelted with colored powder and sprayed with colored liquid, which is sooooo not cool on a 35 degree morning. But I have done worse on a 35 degree morning, like plunge myself through a giant mud pit. 

I took the shirt off after the race and found that my stomach looked as if I had been beaten with a baseball bat, it took a shower and a washcloth of rubbing alcohol to get all the color staining off my legs, stomach and armpit. Yes in my armpit, on my left side because that's mostly where the color hit. Left lane was for the faster folks like me. 

Even though the race wasn't time I ran it in about 27 minutes, would have been faster if I had not had to wade through about 300 people to finally get to the starting line itself. Then dodging people who thought they were fast but weren't. I felt like a super fast runner with all the people I was passing, but in reality I know I'm around average when it comes to time. 


So back to bread right? I'm sure you really don't care about my running.

So this bread, starts off like any other bread. Flour, yeast, salt, water, oats, oil, and a touch of sugar.

Bring it all together in the mixer until you get a dough to come together, or in my case, cling to the hook.


Then you have to let this baby rise - twice. The recipe gave a trick to this, turn your oven to 400 degrees F for about 2 minutes. Then turn off. Stick your dough in, covered with plastic wrap in your greased bowl and let rise for about 1 - 1 1/2 hours until doubled. Then you take it out, knead it again and then repeat this for 1 hour.


Then you bake this loveliness. And it comes out with a beautiful golden crust and a soft texture. It's marvelous. The brown sugar just accents the bread perfectly.

I turned this into about 10 servings, I'm sure in an actual loaf pan it would be more like 12. But seeing as I'm the odd ball, I used a 10 inch cake pan, much like I do for corn bread, and baked. Turned out great for what I do since sandwiches are not something I'm totally keen on every day. I like them but I generally don't make a lot of them at home actually. Strange since it's such an easy meal. Oh well, I would just as soon eat bread toasted with a little butter or fresh out of the oven with a little jam.


Soft and Fluffy Sandwich Bread (Vegan) - From Averie Cooks
Prep Time: 15 min          Cook Time: 30 min          Total Time: 3 hours 30 minutes
Makes: One 8x4-inch loaf pan

Ingredients:
1 cup boiling water
1 cup old-fashioned whole rolled oats (not quick or instant)
2 cups all-purpose flour (bread flour may be used and will create a heartier, chewier bread)
1/4 cup water (from tap, not hot, not cold)
2 to 3 Tbsp canola or vegetable oil (I used 2 myself)
2 Tbsp light brown sugar, packed
2 1/3 tsp instant dry yeast (one 1/4 oz package - Averie and I both use Red Star Platinum)
pinch of salt, optional and to taste

Directions:
1. In a small bowl, pour boiling water over oatmeal, stir to combine. Set aside and let cool until temperature reaches around 130 degrees F, about 15 minutes. (The yeast Averie and I use necessitates this temperature; allow mixture to cool to the 100 degree F range for other types of instant dry yeast, or to package directions)

2. To the bowl of a stand mixer, fitted with the dough hook, (or a large mixing bowl and knead by hand for about 10 minutes) combine flour, 1/4 cup water, oil, brown sugar, yeast, and cooled oatmeal. Knead 5 to 7 minutes on low speed, or until a moist, shaggy dough forms. The dough is fairly moist and sticky, but resist adding additional flour, unless it's so moist that it won't combine. Conversely, if it is too dry, add up to 1/4 cup water. Erring on the side of too moist is always preferable to dry in bread making.

3. After kneading, turn the dough out into a large, greased bowl, cover with plastic wrap, and let it rise in a warm, draft-free place for about 90 minutes, or until doubled in size. Create a warm environment by preheating your oven to 400 degrees F for 1 to 2 minutes, then shutting off. This creates a 90 degree F -ish warm spot. Slide the bowl in and wait while the yeast works. Just make sure your oven is off.

4. After the dough has doubled, punch it down, turn it out onto a floured surface, or silpat and knead it for about 3 minutes. With your fingers, shape it into a 10-inch by 6-inch rectangle, just eyeball it. The long side should be slightly longer than the baking pan. Then, fold the short sides in so that the dough is about 8 inches in length. Roll to form a tight cylinder. There's not much to roll, about 3 turns. Optionally, when rolling, sprinkle with cinnamon, nutmeg, ground ginger. Or go savory with dill, chives or thyme.

5. Spray an 8x4-inch loaf pan with floured cooking spray, or spray with non-stick spray and add flour to pan and shake out extra, and place the cylinder in the pan, seam side down. Cover with plastic wrap, and allow dough to rise in a warm, draft-free place until doubled, about 60 to 75 minutes.

6. In the last minutes of rising, preheat oven to 350 degrees F. Bake for about 30 minutes, or until domed, golden, and puffy. When tapped, it should sound hollow. The internal temperature should reach 210 degrees F. Let bread cool in pan for 5 to 10 minutes before turning out onto a wire rack to cool completely before slicing (of course if your name is Sarah or Mike, you can't help but eat bread when it's fresh out of the oven with some delicious butter.)

Store bread by wrapping in plastic wrap, be sure the bread is completely cooled. Then place in a zip lock bag and it will keep fresh for 5 days. Bread freezes well and can be stored similarly in the freezer for up to 3 months.

Now go out and cook and bake. Have to cook something to eat with this bread. Like eggs and bacon. 

Friday, April 12, 2013

Bacon & Onion Pull Apart Bread

The weekend is coming, the weekend is coming!!!!  Also, Spring turkey season is coming on Monday.

Mike will be out early in the morning to go and outsmart a Tom or Jake and bring him back as a trophy, bragging rights to his neighbor, and dinner. :) You will probably be able to find notes and stories about his first turkey hunt of the season at his hunting blog "Fowl Mouthed Therapy."

So this last week I have spent hunting down Peeps, yes Peeps. Those fluffy sugar covered marshmallow confections shaped to look like rabbits and chicks. Yes, those. My mother didn't buy any for Easter this year (goodness knows why!?) so I had to go hunt them down. Unfortunately it seems that Walmart dumped them and ran out FAST! So I had sort of given up on them and came to terms that the next opportunity I would get to have peeps would be July for the 4th.

But wait!!!! On a routine run to Hyvee for a quick food pick up I came across the mother load.


10 cents for the chicks and smaller options of bunnies and 25 cents for the larger groupings of peeps. YES YES YES!!! I bought about 10. But hey, a girl has gotta have her peeps from Easter, it's just not Easter without them.

So that was one of the major accomplishments of this week, I know, I'm totally a thrilling person who lives such a fascinating life.

ANY-WAY...........

Since this was a more restful week in preparation for a 5k I will be running tomorrow I decided I would make a few things. My oven has a bit lonely lately with my lackadaisical approach to baking this past few months.

What I chose to bake? Bacon & Onion Pull Apart Bread. I have never made a pull apart bread for one and the idea of bacon and onion in bread was just intriguing and such a wonderful idea.


The ingredient list was not terribly extensive nor were the directions complicated. Just time consuming, as any bread usually is - unless you have a bread machine. Even then it's time consuming having to wait for the silly thing to finish.


I like things that are simple to throw together. Such as tossing in flour, milk, sugar, eggs, yeast, salt, milk and butter together to create a lovely dough that will soon rise and create a puffed fluffy dough ready and willing for the filling. (ignore my naked foot in that picture above there).


So the main reason I wanted to make this was the bacon, I mean come on, it's BACON! I love bacon, I really do. To think at one time I wouldn't eat this delicious salty and savory strip of meat. I mean, what was wrong with me!? If you don't like bacon, there's something wrong - you need to get your head checked. Who can resist a food that cheers for you as it cooks and just crisps up so nicely as well as accents just about any dish perfectly. Salad, sandwiches, casseroles, potatoes, sides, veggies, and even cupcakes! It can also be eaten for every meal and snack, so I would say this is the perfect food. Breakfast, lunch, dinner, snack and dessert. Yes please.


So then there's the onion. A large onion, caramelizing in the bacon grease. Which I have no finesse for caramelizing onions I suppose, as you can see here:


As you can see, I burned a few pieces. I just need more practice I suppose. Or let Mike take care of the onions like I normally do. We really need a place together, this way I can avoid onions in the future.


Soon you have to chop up your bacon so that it's in nice bit sized pieces to sprinkle all over the lovely dough. How gorgeous is that bacon?


So now we have this beautiful golden egg-y dough. It was quite lovely for bread. I had to stretch it out and try to create square out of it so I could sprinkle my bacon and onion and then cut into strips, which then get cut into squares.


Having to pile this into a loaf pan (in my case a mini loaf pan) is tricky and the help of a bottle of Dawn dish soap and a can of cooking spray helped hold my pan upright on end so I could do so.


But in the end it's worth the pain of having to constantly readjust the pan so it doesn't go sliding off the counter and to the floor. But in the end it should kinda look like this in the pan. Then you bake and wait.


In the end it comes out gloriously golden brown and smelling AH-MAZING! Talk about my apartment smelling like I was just making breakfast. I'm sure the neighbors are jealous. Way better than the fish smell that used to overtake before the crazies moved out.


And when it's cool enough to pull from the pan, you have this, a nugget of delicious, bacon, onion, and dough. The recipe is from Yummly and they suggested serving with some maple syrup. I tried it and was ok, I preferred some nice salted spreadable butter. It was a heart attack in a bite that way but was soo delicious. Will work on my onions next time.

Bacon Onion Pull Apart Bread - by Yummly
Serves about 8-16 (depends on how many pieces you decide is a serving.
Makes 1 regular loaf or 2 mini loaves

Ingredients
Bread:
4 Tbsp unsalted butter/margarine
2/3 cup milk (I used skim)
3 cups all purpose flour - divided (I used unbleached)
2 Tbsp granulated white sugar
2 1/4 tsp (usually 1 pkt) active dry yeast (I used Red Star Platinum)
1 tsp salt
2 large eggs (I brought mine to room temperature - you can do this by letting sit out or placing in hot tap water for a few minutes)

Filling:
10 slices bacon, prepared and chopped (about a 12 oz pkg)
1 large onion, sliced
olive oil, if needed (I had plenty of bacon grease)
dash of salt
sugar, optional

Directions:
Make the dough:
1. Melt the butter together with the milk over low heat on the stove top until butter is melted. Remove from heat.
2. Combine 2 cups of flour, sugar, yeast, and salt in a bowl. Add your butter-milk mixture and mix until your flour is moist. Mix in your eggs one at a time. Add the remaining cup of flour and mix it in until a soft dough forms. Knead it for a few minutes more. Transfer the dough to a lightly oiled bowl, cover with a light cloth, and let sit in a cool place for about an hour.

Make the Filling:
3. Cook your bacon. Pan-fry your bacon (or cook however you prefer). Set your cooked slices aside on a paper towel and let it sit. Reserve the bacon drippings to caramelize the onions (or just use olive oil if you prefer).
4. Caramelize your onions. Slice up a whole onion. Make sure the bottom of your pan is coated with reserved bacon drippings (or olive oil) and toss in your onions. Sprinkle them with salt and let them cook over medium heat for about 30-45 minutes. NOTE: you may need to turn the heat down on your stove top or add more oil if the onions are drying out too quickly. You'll need to stir them and monitor them closely. Scraping them up off the pan if they burn, and usually with more frequency toward the end of the process.

Assemble the bread:
5. On a well flour board (with a well floured rolling pin), roll out the dough into a very large rectangle or square (20in x 12in or 16in x 16in at least is probably good). The dough is very stretchy, especially when you're putting it into the loaf pan, so more is better.
6. Spread your caramelized onions and bacon across the entire surface of the dough, even up to the edges.
7. Turn your loaf pan onto it's narrow side. Slice your dough into long strips (probably about 4 inches wide) and stack those strips on top of each other. Very gently cut the stacked strips into squares (or rectangles) and pile those stacked squares into the loaf pan until you have got a Jenga like, filled pan.

Bake the bread:
8. In an oven preheated to 350 degrees Fahrenheit, bake your bread for 30-40 minutes (or until it's very golden brown on top - but not burnt).
9. Remove it from the oven and let it sit in the pan for at least 10 minutes before shifting it out.
10. Once the bread has cooled a little, serve and enjoy.

Can drizzle with maple syrup, spread with butter, jam, or eat on it's own. You can even tweak and add herbs and spices to the dough. You're choice, get creative.

Now go out and cook!